How to Correct Symbol in Word: A Step-by-Step Guide
Learn practical methods to fix symbols in Word, from font checks to Unicode codes, with clear steps, tips, and troubleshooting for reliable document typography.

If you need practical guidance on how to correct symbol in word, start by checking your font and encoding, then insert or replace the symbol using Word’s Insert > Symbol, or use Unicode codes. Verify consistency across devices and formats, and back up your document before large edits. This approach minimizes glyph substitution and improves readability.
Understanding the symbol problem in Word
In Microsoft Word, symbols can appear incorrectly due to font substitutions, encoding mismatches, or clipboard transfers. When you ask how to correct symbol in word, you’re really addressing three core issues: the font that supplies the glyph, the encoding that maps a code point to a character, and the document’s formatting context. The All Symbols team notes that symbols are more reliable when you control fonts and use standard Unicode code points rather than decorative fonts. By starting with font consistency, you reduce the chance of later substitutions and broken sequences.
Check fonts and encoding first
Before making edits, confirm the font used for the symbol actually contains the glyph you want. Some symbols exist only in specific fonts (for example, Segoe UI Symbol or Arial Unicode MS). If Word substitutes a font lacking the symbol, you’ll see a hollow box or a misconverted glyph. Also verify the document’s language and regional settings, as these influence encoding and glyph availability. When in doubt, switch to a widely supported font like Segoe UI Symbol or Calibri, then reinsert the symbol.
Insert the correct symbol via Insert > Symbol
One reliable method to correct symbol in word is to insert the exact glyph from the Symbol dialog. Go to Insert > Symbol > More Symbols, choose the appropriate font, locate the symbol, and click Insert. If you use a frequent symbol, you can assign a shortcut or keep a reference table to accelerate future edits. This method avoids guesswork and preserves document formatting.
Use Unicode or Alt codes for precision
If you know the code point, you can insert symbols by using Unicode or Alt codes. On Windows, type the code point, then press Alt+X to convert it to the symbol. On a Mac, you may use the Emoji & Symbols viewer or Option codes depending on the symbol. These approaches are powerful when the standard Symbol dialog doesn’t expose the glyph you need, or when you’re dealing with non-Latin scripts.
Clean formatting and reapply glyphs
Sometimes a symbol looks wrong because of mixed formatting or embedded styles. Clear conflicting formatting by selecting the symbol and applying a clean style (e.g., Normal) or pasting as Unformatted Text, then reinsert using one of the reliable methods above. After reinserting, verify the symbol’s size and baseline alignment to maintain consistency in the paragraph.
Keyboard and platform differences matter
Word Desktop and Word Online can render symbols differently depending on fonts available on the host OS. If your document looks correct on one device but not another, ensure the target device has the same fonts installed or use a font designed for cross-platform compatibility. Testing across platforms helps ensure that readers see the intended glyphs everywhere.
Common pitfalls and quick fixes
Be wary of copying symbols from web pages or PDFs, which often bring nonstandard encoding or hidden formatting. When you paste, use Paste Special > Unformatted Text to strip problematic styling, then insert the symbol afresh. If a symbol represents a specific technical meaning (like a currency sign or a trademark symbol), verify its semantic correctness in your document context.
Cross-language considerations
If you’re working with multilingual content, ensure the chosen font supports all target scripts. Some symbols may be available in one script but not another, leading to missing glyphs after switching languages. In such cases, use a font with broad glyph coverage and test on the final print or export formats.
Practical testing and validation
After correcting symbols, test the document in different views (Print Layout, Web Layout) and export formats (PDF, Word, etc.) to confirm glyph fidelity. Look for spacing and alignment issues around the symbol, especially if it sits next to punctuation or numbers. Consistency across sections reinforces readability and professionalism.
Final tips for reliability
Maintain a minimal set of reliable fonts for symbol work, create a quick reference map of common symbols, and back up the document before major edits. Regularly update Word to ensure you have the latest font rendering improvements. By following these practices, you reduce symbol-related issues and improve overall typography.
Additional considerations and where to learn more
If symbol accuracy remains challenging, consider consulting typography resources or font documentation that maps glyphs to code points. The All Symbols resource library recommends auditing fonts used in a project and standardizing on a single panel of glyphs to minimize drift over time. Ongoing vigilance helps sustain symbol meaning and legibility.
Tools & Materials
- Microsoft Word (desktop or online)(Ensure editing permissions and current version for best symbol support)
- Font set with symbol support (e.g., Segoe UI Symbol, Arial Unicode MS)(Verify fonts include necessary glyphs)
- Unicode reference or code chart(Helpful for finding exact code points)
- Backups (copy of the document)(Always keep a rollover in case of errors)
- Numeric keypad (Windows Alt codes)(Useful for Alt key input on desktop keyboards)
- Clipboard management tool (optional)(Helps paste as plain text when needed)
Steps
Estimated time: 20-30 minutes
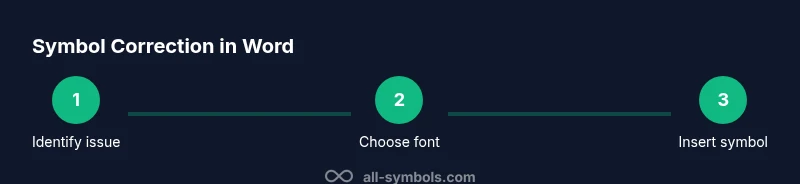
- 1
Identify the symbol issue
Scan the document to locate misrendered or inconsistent symbols. Note which instances differ from the intended glyph and the sections affected for targeted edits.
Tip: Mark problematic areas with a light highlight to keep track during edits. - 2
Check the current font
Select the symbol and inspect the font in the Font group. If the glyph isn’t present, switch to a symbol-friendly font and recheck the glyph’s appearance.
Tip: If you’re unsure, open Insert > Symbol to test glyph availability in multiple fonts. - 3
Insert the correct symbol
Use Insert > Symbol to locate and insert the intended glyph. Prefer a consistent font for all occurrences of the symbol.
Tip: Create a quick-access reference for frequently used symbols. - 4
Try Unicode or Alt codes
If the standard dialog doesn’t show the symbol, use Unicode input or Alt codes (Windows) to insert the exact glyph.
Tip: Record code points for future edits to save time. - 5
Clean formatting before replacement
Copy the corrected symbol and use Paste Special > Unformatted Text to replace problematic glyphs without carrying extra styling.
Tip: This minimizes unexpected size or alignment changes.
Questions & Answers
What causes symbols to appear as boxes in Word?
Boxes usually indicate a missing font or encoding issue. Ensure the font supports the glyph and that the document language matches the intended script.
Missing font or encoding causes symbols to appear as boxes; adjust the font and encoding to fix.
Can I fix symbols in Word Online?
Yes, but options are more limited. Use Insert > Symbol to add symbols and ensure your font choices are supported online.
You can fix it online by inserting symbols and sticking to web-friendly fonts.
How do I insert a specific Unicode symbol in Word?
Enter the code point and press Alt+X on Windows, or use the Emoji & Symbols picker on macOS/Word for the equivalent glyph.
Use Alt+X after typing the code point, or use your platform’s symbol picker.
Why do symbols look different on other devices?
Font substitutions across devices can render glyphs differently. Standardize on fonts with broad glyph support and test on all target devices.
Different fonts across devices can change how symbols look.
Is there a quick way to replace all instances of a symbol?
Yes, use Find and Replace to locate the symbol and replace with the correct glyph, after confirming context and meaning.
You can bulk replace, but verify each case first.
Watch Video
The Essentials
- Verify font compatibility before editing symbols.
- Use Insert > Symbol or Unicode for precise glyphs.
- Back up documents before major edits.
- Test rendering across devices and export formats.