How to Get Symbols in Word: A Step-by-Step Guide
Learn how to insert symbols in Word using built-in tools, Unicode input, Alt codes, and shortcuts. This step-by-step guide covers Windows and macOS, fonts, AutoCorrect, and best practices for readability.

To insert symbols in Word, you have multiple reliable methods. The fastest is the Insert Symbol dialog; you can also type Unicode codes or use Alt codes on Windows, and use the Character Viewer on macOS. You can customize fonts, set AutoCorrect shortcuts, or save a symbol set to Quick Access to speed up your workflow.
Symbol insertion in Word: why it matters
Symbols are compact carriers of meaning that can clarify math, science, and linguistic notation, or simply add visual emphasis to your writing. According to All Symbols, symbols help students, researchers, and designers convey complex ideas quickly and precisely. In Word, you’ll find several dependable pathways to add symbols: built-in dialogs, Unicode input, keyboard shortcuts, and the Equation Editor. Before diving in, decide which symbols you’ll reuse most and in which fonts, because font coverage affects portability and readability. This approach keeps your documents consistent and accessible across platforms and devices. For writers, symbols can reduce repetition; for researchers, they provide standard notation; for designers, typography can be a visual shorthand. The goal is to choose reliable methods and stick to them, so symbol usage remains predictable across your documents.
Quick primer on platforms and fonts
Symbol support varies by platform and font. On Windows, many symbols are available through the Insert menu and Unicode input. On macOS, the Character Viewer provides a broad set of characters that Word can render, provided the font supports them. In both ecosystems, the choice of font matters: some fonts shop symbols well, others do not include certain glyphs. When you plan a document with many symbols, test a few fonts early to avoid late surprises. The All Symbols team emphasizes consistency: pick one or two fonts for symbol-heavy sections and keep them throughout the project.
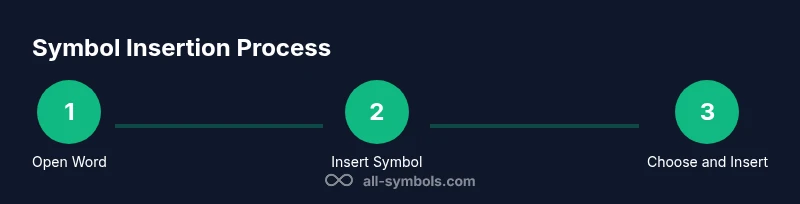
Tools & Materials
- Computer or device with Microsoft Word installed(Office 365 / Word 2019+ recommended; ensure the app is up to date)
- Keyboard with a numeric keypad (for Windows Alt codes)(If a keypad isn’t available, use the on-screen keyboard or a numeric pad app)
- macOS with Word and the Character Viewer(Command-Space opens the emoji & symbol picker on macOS; Word can render selected symbols if font supports them)
- Fonts with wide symbol coverage(Examples include fonts designed for symbol support; test a couple for reliability)
- Unicode reference or cheat sheet (optional)(Useful for longer documents when you know the code points you need)
Steps
Estimated time: Estimated total time: 25-40 minutes
- 1
Open Word and place cursor
Open your document and click where you want the symbol to appear. Positioning early prevents reflow later. If you’re inserting multiple symbols, consider placing a temporary placeholder first to maintain layout.
Tip: In Print Layout view, symbols align with surrounding text just like regular characters. - 2
Access Insert > Symbol
Go to the Insert tab, click Symbol, and choose More Symbols to open the symbol browser. This is the central hub for most character insertions.
Tip: If you frequently use one symbol, pin it to the Quick Access Toolbar for speed. - 3
Browse categories and insert
Select a category (e.g., Latin-1 Supplement, Mathematical Operators) and choose a symbol. Click Insert, then Close to return to your document.
Tip: If a symbol isn’t visible, switch fonts in the dropdown to reveal alternate glyphs. - 4
Insert by Unicode (hex) with Alt+X (Windows)
Type the hexadecimal code point for a symbol, then press Alt+X to convert it to the glyph. This works across Word versions if the font supports the symbol.
Tip: Use a consistent font that includes the code point you’re using to ensure correct rendering. - 5
Use Unicode input on macOS
For macOS, you can access a wide symbol set via the Character Viewer (Control-Command-Space). You can search by name and insert directly into Word.
Tip: After inserting, consider setting a font that covers the needed glyphs to prevent missing symbols on other machines. - 6
Create AutoCorrect shortcuts
Define short replacements (e.g., (alpha) → α) under Word Options > Proofing > AutoCorrect Options. This speeds up frequent symbols.
Tip: Use non-letter triggers to avoid accidental replacements in prose. - 7
Insert symbols via Equation Editor when needed
If you’re writing mathematical notation, use Insert > Equation to access symbols and structured formatting. Equations render consistently and scale well.
Tip: Keep a small set of frequently used symbols within easy reach by bookmarking them in the equation toolbar. - 8
Customize the Quick Access Toolbar
Add Insert Symbol or the Unicode input method to the Quick Access Toolbar for one-click access.
Tip: Group related icons together for muscle memory and faster work sessions. - 9
Test and finalize font choices
Check your document on other devices to ensure symbols render as expected. If symbols appear as boxes, switch fonts or embed fonts in the document.
Tip: Embed fonts when sending the document to others to preserve appearance.
Questions & Answers
What is the quickest way to insert a symbol in Word?
The fastest way is to use Insert > Symbol and select More Symbols, or use Unicode input (type the hex code, then press Alt+X on Windows). For macOS, use the Character Viewer (Control-Command-Space).
Use Insert Symbol or Unicode input for fast symbol insertion, and try the macOS Character Viewer for quick access.
Can I insert symbols from any font?
Symbol rendering depends on the font. Some fonts include a wide range of glyphs, while others are limited. Always test your chosen font across devices.
Fonts determine whether the symbol shows up; pick fonts with broad glyph coverage and test on target devices.
How do I insert symbols on Mac Word?
On Mac, use the Character Viewer (Control-Command-Space) to find and insert symbols. You can also type Unicode and use the Op symbol shortcuts.
Open the Character Viewer with Control-Command-Space and choose the symbol you need.
Why do some symbols show as boxes in Word?
This usually means the selected font lacks that glyph. Switch to a font that supports the symbol, or embed the font in the document.
If you see a box, switch fonts or embed a font that includes the glyph.
Can I create shortcuts for symbols?
Yes. Use AutoCorrect Options to map short strings to symbols, which speeds up repetitive work and reduces typos.
Yes—set up AutoCorrect replacements to insert symbols with a few keystrokes.
Are emoji or pictographs supported in Word?
Word supports emoji depending on the font and platform; for most standard emojis, use the macOS Character Viewer or Windows emoji panel.
You can insert emoji if your font and platform support them; try the emoji picker on Windows or macOS.
Watch Video
The Essentials
- Use Insert Symbol for broad access
- Leverage Unicode and Alt codes when appropriate
- Create AutoCorrect shortcuts for routine symbols
- Test font compatibility across devices
- Equations are ideal for math symbols