How to Symbol in Word: Insert Symbols with Confidence
Master inserting symbols in Word with Insert Symbol, Unicode shortcuts, and the Equation Editor. Learn workflows for Windows and macOS, build a symbol library, and troubleshoot font issues for clear, consistent documents.

Learn how to symbol in word with Word’s built‑in tools. In Word, you can insert symbols via Insert > Symbol, type Unicode codes then press Alt+X, or use the Equation Editor for math glyphs. This quick guide covers the essentials so you can add degree signs, arrows, check marks, and more without leaving your document.
Getting started with symbols in Word
Symbols are a fundamental part of clear scientific notation, mathematical reasoning, and branded document design. In Word, you’ll work with symbols as characters, not as images, which keeps formatting consistent when you edit text. The first step is to understand the scenarios where symbols matter: annotations in research reports, chemical or mathematical notation in student papers, or simple diacritics in multilingual documents. This section introduces the core options and why you should choose one workflow over another. You’ll learn how to quickly access a large catalog of characters, how to match symbols to fonts to maintain readability, and how to reuse your favorite symbols across different Word files. If you’re new to this, start by identifying a handful of symbols you use regularly and map them to a preferred font in your document template.
Using Insert Symbol dialog
The Insert Symbol dialog is the most universal method to bring in any character your font supports. Open Word, place the cursor where you want the symbol, and navigate to Insert > Symbol > More Symbols. From here you can select a font family, choose a subset (such as Latin-1 Supplement for many common symbols, or Mathematical Operators for math glyphs), and click Insert. If you often use a symbol, click the “Shortcut Key” button to assign a keystroke. This creates a fast, repeatable workflow that keeps your document layouts consistent. Remember to choose a font that includes the specific glyph; otherwise the symbol may render as a blank box or a fallback character.
Keyboard shortcuts and Alt codes across Windows and macOS
Power users rely on keyboard shortcuts to speed up symbol insertion. Windows users can type a Unicode code in some fonts and then press Alt+X to convert it into the symbol. For example, typing the code for a degree symbol and pressing Alt+X will render the glyph. On macOS, you can access the Character Viewer (Control+Command+Space) to insert symbols, or use Option-based shortcuts for many common glyphs. Cross‑platform consistency comes from choosing a core set of symbols and sticking to a standard font in your template. Practice with a few favorites to develop fluency. If you’re collaborating, document which fonts you rely on so others can reproduce the same symbols.
Working with the Word Equation Editor for math symbols
For mathematical notation, the Equation Editor offers powerful controls beyond simple glyphs. Insert > Equation creates a math region where you can type formulas, insert Greek letters, and apply formatting for readability. The equation environment natively supports many symbols, and you can mix text with math for labeled diagrams. If your symbol needs are heavy on math notation, enable AutoCorrect replacements for frequent phrases (e.g., replace (->) with an arrow). Equation editing also helps when you need to adjust spacing, alignment, or font style for math content, ensuring your work looks professional and consistent.
Custom symbol libraries: building and using AutoCorrect replacements
A practical way to speed up symbol insertion is through AutoCorrect entries. Define short, memorable strings (for example, ":deg" for ° or ":check" for ✓) that automatically expand into symbols. This approach works well across Word documents and is portable between devices if you save it in your Word template or Normal template. Regularly review your AutoCorrect list to remove rarely used shortcuts and avoid conflicts with existing text. Create backups of your template so teammates can adopt the same efficiencies.
Troubleshooting fonts and encoding: common issues
Symbols rely on font glyph availability. If a symbol renders as a square or missing glyph, switch to a font known to include the glyph (e.g., Calibri, Arial Unicode MS, or a math-friendly font like Cambria Math). Encoding issues can occur when sharing documents across platforms; keep the document font-embedded whenever possible and avoid mixing symbol-rich fonts with plain text fonts. If you cannot find a symbol, try a similar glyph from a different font rather than forcing an unsupported glyph. Finally, ensure Word is up to date to access the latest symbol sets.
Practical examples: common symbols you’ll use often
Some symbols appear so frequently they deserve a dedicated workflow. Degree symbols are common in science reports; check marks appear in rubrics and feedback; arrows help annotate processes; infinity symbols convey limits in mathematics; the section sign is used in legal or organizational documents. Use Insert > Symbol or a keyboard shortcut to insert each glyph, and align your symbol choices with your document’s font and style guidelines. If you frequently use a subset, add those symbols to a Quick Access toolbar for speed and consistency.
Accessibility and cross‑platform considerations
Symbols should be accessible to all readers. Ensure sufficient contrast when symbols appear in colored or themed text, and avoid decorative glyphs that mimic letters in ways that can confuse screen readers. When sharing documents, provide alt text for symbols embedded in images or equations, and consider adding a short glossary for readers unfamiliar with specific glyphs. If you work across Windows and macOS, test your document on both platforms to confirm that symbols render identically and that font substitutions don’t alter meaning.
Best practices for consistent symbol usage in documents
Consistency beats novelty. Create a symbol roster for your team that lists each glyph, its font, and its preferred usage (scientific notation, bullet markers, decorative accents). Document any AutoCorrect shortcuts and ensure templates enforce the same font family for symbols. When updating templates, perform a quick audit to verify that all inserted symbols still render correctly after font changes or Word updates. Finally, maintain a minimalist symbol set to prevent clutter and maintain readability.
Tools & Materials
- Microsoft Word (Windows/macOS)(Ensure you have a recent version with Symbol and Equation support)
- Fonts (e.g., Calibri, Arial, Cambria)(Use fonts known to include common symbols)
- Mouse or trackpad(Needed for precise symbol selection in dialogs)
- Insert > Symbol dialog access(Primary method for non‑font glyphs)
- Unicode/Alt code reference (optional)(Helpful for rapid insertion across documents)
- macOS Character Viewer (Control+Command+Space)(Alternate symbol source on Mac)
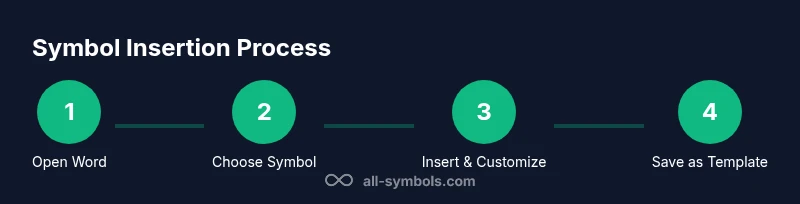
Steps
Estimated time: 30-45 minutes
- 1
Open Word and place the cursor
Open the document where you want a symbol. Click at the exact insertion point to ensure the glyph appears in the correct location and line up with surrounding text.
Tip: If you plan to reuse this symbol, note its font choice and size first. - 2
Open Insert Symbol dialog
Navigate to Insert > Symbol > More Symbols to view the full catalog of glyphs. This panel lets you filter by font and subset.
Tip: Choose a font you’re committed to for consistency, then explore the available subsets. - 3
Select a symbol and insert
Pick the desired glyph from the list and click Insert. Close the dialog once you’ve added the symbol.
Tip: If you insert many symbols, consider setting up a shortcut as described in Step 4. - 4
Assign a keyboard shortcut (optional)
Click the Shortcut Key button in the dialog to map a keystroke to the symbol for quick reuse.
Tip: Choose a memorable shortcut that doesn’t conflict with existing Word shortcuts. - 5
Use Unicode and Alt+X (Windows) or Character Viewer (Mac)
For Windows, type the Unicode code and press Alt+X to convert it to the symbol. On Mac, use the Character Viewer to insert the glyph.
Tip: Keep a small reference sheet of codes you use often. - 6
Create AutoCorrect entries
Set up AutoCorrect replacements (e.g., :deg → °) to insert symbols rapidly as you type.
Tip: Document these shortcuts in your template so teammates can reuse them. - 7
Insert multiple symbols efficiently
If you need several symbols, reuse a prepared Word template or copy/paste from a symbol list to speed up workflow.
Tip: Avoid pasting symbols from unreliable sources; ensure they render in your document font. - 8
Save and share your symbol workflow
Save your setup in a template and share it with colleagues to maintain consistent symbol usage across projects.
Tip: Attach a short guide to your template describing the standard fonts and shortcuts used.
Questions & Answers
How do I insert a symbol in Word on Windows?
Use Insert > Symbol > More Symbols to choose a glyph, or type a Unicode code and press Alt+X to convert it to a symbol. You can also assign a keyboard shortcut for fast insertion.
Go to Insert, pick Symbol, and you can type the code then press Alt+X to insert quickly.
Can I insert math symbols without the equation editor?
Yes. Use Insert > Symbol for a broad set of math glyphs, or use the Equation Editor for more complex notation. The Equation Editor is best for mixed text and formulas.
You can use the Symbol dialog, or the Equation Editor for more complex math.
How do I insert symbols on Mac Word?
On Mac, you can open the Character Viewer with Control+Command+Space, or use Option-based shortcuts for common glyphs. AutoCorrect can also replace short strings with symbols.
On Mac, open the Character Viewer or use simple Option shortcuts; you can automate with AutoCorrect.
Why do some symbols look different across documents?
Symbol rendering depends on font choice. Ensure the same font is used throughout a document and consider embedding fonts if sharing. Inconsistent fonts can cause glyph substitutions.
Font consistency is key; embed fonts if sharing widely.
Is there a limit to how many symbols I can insert?
There’s no fixed limit in Word, but heavy symbol usage can affect readability. Use a focused set of common symbols and consistent fonts.
Word doesn’t cap symbols, but keep readability in mind.
Can I share my symbol shortcuts with teammates?
Yes. Save your setup in a template or Normal.dotm and document the shortcuts in a short guide so colleagues can reuse them.
Share via templates and a quick guide so teammates can reuse your shortcuts.
Watch Video
The Essentials
- Learn Insert Symbol to access broad glyph options
- Master Unicode/Alt+X and macOS shortcuts for speed
- Build a symbol library with AutoCorrect for consistency
- Check fonts and encoding to avoid rendering issues