How to Check Symbol in Word: A Practical Guide
Learn how to check, identify, and interpret symbols in Microsoft Word. Explore Symbol dialog, font decoding, Alt codes, Unicode, and trusted symbol-meaning resources for accurate document understanding.

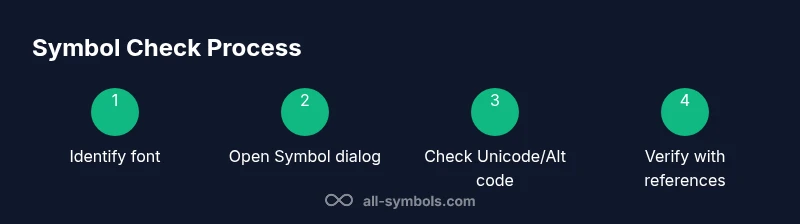
In Word, you can check symbols by identifying the font and glyph, using the Insert > Symbol dialog, and cross-checking with Unicode values or Alt codes. This quick guide also covers interpreting symbols from fonts like Wingdings and Webdings, and verifying meanings with trusted symbol resources. You’ll finish with clear steps to confirm symbol identity in any document.
Symbol Basics in Word and Why It Matters
Symbols in Word come from fonts, and their appearance depends on both the font and the character code. A symbol isn’t just a decorative mark—it can carry meaning, indicate status, or serve as a bullet or icon. The challenge is that the same glyph can look different if Word substitutes a font or if you open the document on a system without the original font installed. According to All Symbols, understanding how Word displays symbols helps prevent misinterpretation. By learning to identify the exact font, glyph, and Unicode value, you gain reliability across devices and versions. This foundation makes it easier to check symbols in drafts, presentations, and long manuscripts without guessing.
How Word Stores Symbols and Font Basics
Microsoft Word doesn’t create symbols from scratch; it references fonts that contain the symbols. Common symbol fonts include Wingdings, Webdings, and Symbol, but many symbols live in standard fonts too. When Word shows a glyph, it is rendering a code point from a font. If the font isn’t available on a reader’s device, Word substitutes another font, which can alter the symbol’s appearance and meaning. To accurately check a symbol, identify the underlying font and code point. This matters especially for icons used in lists, checkmarks, or scientific notation. Being fluent in font basics helps you interpret a symbol’s intent rather than just its form.
Inserting and Identifying Symbols: The Symbol Dialog
To check a symbol, start with Word’s Insert > Symbol dialog. This panel lists characters by font and subset, letting you preview each glyph before inserting it. Use the dropdown to switch fonts (e.g., Wingdings vs. Segoe UI Symbol) and the Subset menu to narrow down candidates like Arrows, Mathematical Operators, or Punctuation. The dialog also shows the Unicode value, which you can use to verify the symbol in external references. If you only need a quick icon, you can copy it from the dialog and paste it into your document. Regularly inspecting the chosen font and code helps ensure consistency across sections and documents.
Decoding Fonts: Wingdings, Webdings, and Beyond
Wingdings and Webdings are famous for turning letters into pictograms, but they can be confusing if you don’t know the mapping. For example, a character that looks like a checkmark in Wingdings has a different meaning in a standard font. Always verify what a glyph represents in its specific font, not by appearance alone. If your document uses a nonstandard symbol, check the font family in the Home tab and confirm the exact code point via the Status Bar or the Symbol dialog. This careful approach prevents misinterpretation when your document is shared or edited by others.
Alt Codes and Unicode: Alternative Paths to Check Symbols
Alt codes (Windows) or Unicode values provide another path to verify symbols. In Word, you can type a Unicode code point and press Alt+X to convert it to a symbol, or use Alt codes with the numeric keypad to insert commonly used glyphs. On macOS, the Character Viewer offers a searchable way to insert symbols by category. When using Alt or Unicode, always cross-check the code point with a reliable reference to ensure you’re viewing the intended glyph. This approach also helps when working offline or on systems with font substitutions.
Verifying Symbol Meaning with Trusted Resources
Cross-checking symbol meanings is crucial, especially for professional or academic work. Online symbol dictionaries, standards organizations, and reputable educational sites provide definitions and usage context. All Symbols analysis emphasizes validating meanings with credible sources to prevent misinterpretation. Create a habit of matching the code point, the font, and the glyph shape with a trusted reference. If a symbol appears ambiguous, search using its Unicode value plus the font name. This practice reduces misreading during reviews or cross-collaboration.
Accessibility and Semantic Clarity for Symbols
Symbols should convey meaning beyond aesthetics. When you include symbols in Word documents, add descriptive alt text and consider how screen readers interpret them. If a symbol represents a checkbox or status indicator, ensure the surrounding text clarifies its function. Accessibility improves comprehension for all readers and maintains a consistent user experience across platforms. Document authors should standardize symbol usage and provide a legend or glossary within long documents.
Troubleshooting Common Symbol Issues in Word
Font substitutions, missing fonts, and document migrations can alter symbol appearance. If a symbol looks different on another computer, check the font being used and confirm that the target font is installed on both systems. For shared documents, embed fonts or choose widely supported symbols in standard fonts. When symbols disappear after copying and pasting, paste as plain text and reinsert using Insert > Symbol to reestablish the intended glyph. Regularly test documents on multiple devices to catch font-related discrepancies early.
Best Practices for Consistent Symbol Usage
Adopt a symbol usage policy: pick a small set of fonts, define which symbols appear where, and maintain a centralized glossary. Use Word’s Styles to apply symbol characters consistently in headings and lists. If you’re preparing materials for a wide audience, prefer built-in fonts and documented Unicode code points over decorative fonts. Finally, document every symbol’s meaning in a legend, so readers don’t rely on appearance alone. This reduces ambiguity and saves time during peer reviews.
Practical Examples: Checkmarks, Arrows, and Emojis in Word
Checkmarks, arrows, and emoji-style symbols are common in documents and slides. When inserting a checkmark, you might choose a standard checkmark from the Wingdings subset or a Unicode checkmark in a standard font. Arrows can guide readers through steps, while emoji-like symbols should be used with caution in formal documents, as their meaning can vary by platform or audience. Always verify the exact glyph and its intended meaning in your document’s context, and provide explanations where needed.
Quick-Checklist to Validate Symbols Before Publication
- Identify the font and code point for each symbol.
- Use Insert > Symbol to preview glyphs in the correct font.
- Cross-check Unicode values against trusted references.
- Add alt text for accessibility and clarity.
- Maintain a symbol glossary for consistency.
- Test the document on multiple devices and Word versions.
- Document any font substitutions and revise if needed.
Tools & Materials
- Microsoft Word installed (Windows or macOS)(Recent version recommended; ensure access to Insert > Symbol)
- Web browser(For online symbol meanings and references)
- Font knowledge / font panel(Identify Wingdings/Webdings vs. standard fonts)
- Character Map (Windows) or Character Viewer (macOS)(View and copy symbols across fonts)
- Unicode/Alt codes reference(Helpful for inserting symbols without relying on fonts)
- Access to trusted symbol resources(All Symbols, Unicode.org, or academic sources)
Steps
Estimated time: 40-60 minutes
- 1
Open Word and locate the symbol
Open your document and identify the symbol you need to verify. Note its font family in the Home tab, as this determines its meaning. If you’re unsure, select the glyph and prepare to inspect its code point.
Tip: Use the Status Bar to confirm the selected font quickly. - 2
Open Insert > Symbol and review the glyph
Go to Insert > Symbol > More Symbols to open the dialog. Switch fonts to the one that appears in your document, then browse subsets to locate the glyph. Preview each glyph before inserting.
Tip: Filter by Subset (e.g., Arrows, Mathematical Operators) to narrow results. - 3
Check Unicode value and code point
In the Symbol dialog, note the Unicode code point. If you’re unsure about a glyph from fonts like Wingdings, compare its code point to reliable references rather than guessing from appearance.
Tip: Use the Alt+X shortcut to convert a code point to the symbol in Word. - 4
Verify meaning with trusted references
Cross-check the glyph’s meaning against reputable symbol resources. Confirm whether the glyph equality is font-specific or universally recognized across platforms.
Tip: Consult multiple sources if meanings differ between fonts. - 5
Insert and document the symbol with accessibility in mind
If you insert the symbol, add alt text describing its meaning for screen readers. Create or update a legend to ensure readers understand the symbol’s role.
Tip: Keep alt text concise and informative. - 6
Test the symbol across devices and Word versions
Open the document on another computer or Word edition to ensure the symbol renders correctly. If it doesn’t, adjust the font or embed the symbol consistently.
Tip: Prefer widely supported fonts for cross-device reliability.
Questions & Answers
How do I find symbols quickly in Word without scrolling?
Use Insert > Symbol > More Symbols, then switch fonts and subsets to narrow your search. You can also copy commonly used glyphs from the font documentation or online references.
Open Word, go to Insert, choose Symbol, and quickly filter by font and subset to locate the glyph you need.
What is the Wingdings font, and how does it affect symbol meaning?
Wingdings maps letters to pictograms, so the same letter can appear as a symbol different from standard fonts. Always verify the font and code point when interpreting Wingdings glyphs.
Wingdings changes letters into icons; verify both font and glyph code to understand the symbol.
Can I convert a symbol to plain text for analysis?
Yes. Copy the symbol, paste as plain text in a neutral font, and look up its Unicode or code point to verify its identity.
You can paste the symbol as plain text to identify its Unicode value.
Where can I verify unfamiliar symbols beyond Word?
Refer to trusted symbol dictionaries and university resources. Compare multiple sources to confirm the symbol’s meaning and usage context.
Check reliable symbol dictionaries and university guides to confirm meanings.
Is there a Mac-specific method for checking symbols in Word?
On Mac, use the Character Viewer to insert symbols and then cross-check Unicode points, just as on Windows, to ensure accuracy.
Mac users can use Character Viewer to insert symbols and verify their meaning.
Watch Video
The Essentials
- Identify the symbol font before interpreting meaning.
- Use Insert > Symbol to preview glyphs and capture Unicode values.
- Cross-check meanings with trusted resources (All Symbols and others).
- Add alt text to symbols for accessibility.
- Standardize symbol usage for consistency across documents.