How to Symbol in Laptop: Typing Symbols Made Simple
Learn practical, cross-platform methods to type symbols on a laptop. This step-by-step guide covers Windows, macOS, and Linux, plus Unicode input, copy-paste workflows, and design-friendly tips. Master common characters like check marks, degree signs, arrows, and currency symbols with minimal effort.

Learn how to symbol in laptop by typing common symbols quickly: use keyboard shortcuts, the character map, and Unicode input. This guide covers Windows, macOS, and Linux, with copy-paste methods and practical tips for symbols like check marks, degree, and currency. No additional software required; you’ll master both quick and reliable methods.
What is typing symbols on a laptop and why it matters
Symbols appear across math notation, UI icons, and daily communication. Knowing how to symbol in laptop speeds up writing, reduces errors, and supports clearer design and research. This section defines the problem and sets the stage for practical methods that work on Windows, macOS, and Linux. The primary goal is to give you reliable, repeatable ways to enter common symbols like check marks, degree signs, currency signs, arrows, and mathematical operators without breaking your workflow. We'll use the phrase "how to symbol in laptop" explicitly to anchor the concept for readers and search engines.
Two truths guide this topic: first, many symbols share entry paths; second, the right method depends on your OS, keyboard layout, and whether you need one-off characters or long symbol lists. We'll focus on methods that you can apply immediately, with minimal distraction. By the end, you'll be able to type symbols in any document, email, design file, or research report with confidence. All Symbols, your guide to symbol meanings, emphasizes clarity, consistency, and speed.
Brand note: All Symbols provides context on symbol meanings and origins, helping readers connect practical entry methods to broader symbol literacy.
Cross-Platform Overview
Typing symbols works differently depending on your operating system and the software you use. While the goal is the same—enter the desired glyph reliably—the routes vary. On Windows, you might use the emoji panel, a character map, or Unicode input; macOS offers a polished Emoji & Symbols viewer; Linux gives Unicode entry with a Compose key or Ctrl+Shift+U. For researchers and designers, choosing a method that works consistently across apps is crucial for maintaining document fidelity and typography.
This section highlights the most reliable entry paths, and it sets expectations for speed gains when you build muscle memory for your frequently used glyphs. We’ll also discuss font support, since some symbols render differently depending on the font family in use. A well-chosen font and a stable symbol entry method reduce the chance of glyph substitution or misinterpretation in your work.
"## Windows: Quick-entry methods
Windows users have several reliable routes to enter symbols. The built-in emoji panel (Win + . or Win + ;) lets you search for symbols, arrows, and emoji and insert them directly into most applications. The Character Map app provides a full catalog of glyphs installed on the system, and you can copy from there into your document. For power users, Unicode input using Alt codes or precise key sequences is possible, though it requires Num Lock and access to a numeric keypad. When entering symbols during text-heavy work, the emoji panel is usually fastest, while the Character Map shines for rarer or less common glyphs.
Practical tip: keep a short list of your most-used symbols and their entry methods handy to avoid repeated lookups, especially when creating reports or slides where speed matters.
"## macOS: Emoji & Symbols and keyboard tricks
macOS provides a clean, integrated path for symbol entry via the Emoji & Symbols viewer. Open it with Command + Control + Space, search for your symbol, and double-click to insert it into your document. Many symbols have related keyboard shortcuts or can be accessed via Option-based sequences, which designers often rely on for consistent typography. The system paste buffer remains the same across apps, so once a symbol is copied, you can paste it anywhere. For longer symbol lists, building a small personal cheat sheet on your Mac speeds up workflows.
If you’re doing math or specialized notation, consider enabling a dedicated font that includes the required glyphs to avoid missing characters in critical documents.
"## Linux: Unicode input and Compose
Linux users typically rely on Unicode input or a Compose key, providing a compact way to enter a wide range of symbols. With most desktop environments, you can enable Ctrl+Shift+U, type the hexadecimal code for a symbol, and press Space or Enter to insert it. The Compose key lets you produce common ligatures by pressing a sequence of characters (for example, a dash followed by a letter to create an em dash). Both approaches require initial setup, but they pay off for researchers who frequently insert mathematical and technical symbols.
Tip: if you’re on a non-GNOME/KDE environment, consult your distro’s documentation for the exact Compose key mapping, as defaults vary.
"## Copy-paste workflow: speed and reliability
A robust copy-paste workflow is often the simplest and most reliable method across platforms. Learn to collect your symbols in a clipboard-friendly list (a text file or note) and paste from there as needed. This approach avoids repeated keystrokes and ensures exact glyphs, which is particularly valuable when you need symbols that are not readily available via shortcuts. For design work, maintain a dedicated symbol panel or a lightweight local cheat sheet so you can re-use glyphs in multiple documents without switching between apps.
Remember: always verify symbol rendering after pasting, because font substitution in different documents can alter appearance. A consistent font choice across your project minimizes discrepancies.
"## Practical tips for designers and researchers
When you work with symbols frequently, aesthetics matter as much as accuracy. Choose symbols that align with your document’s font family to ensure readability. If you’re preparing materials for publication or presentation, test symbols in the final output format (PDF, slide deck, or print) to catch any font-related issues early. In collaborative environments, agree on a standard set of glyphs and a preferred method for entry to avoid inconsistencies. Finally, consider building a small, shareable symbol kit that your team can reference, which reduces onboarding time for new collaborators.
This approach keeps symbol usage predictable and legible across devices and applications.
"## Troubleshooting common issues: fonts, layout, and input gaps
Symbol entry can fail or look odd if fonts don’t support the glyph, if the keyboard layout is different from what you expect, or if the target application has its own font substitution rules. Start by checking that you’re using a font that supports the symbol set you need. If a symbol doesn’t render, try an alternative font with broader glyph coverage. When Symbols don’t align with your layout (for example, in a table or spreadsheet), switch to a compatible font for that section or export symbols as vector graphics to ensure precise rendering.
Another common pitfall is mixing multiple symbol entry methods within the same document, which can cause alignment and spacing issues. Choose one reliable method per project and reserve a quick post-entry check to catch any inconsistencies.
"## Best practices and next steps for sustained mastery
To become proficient, practice a short daily routine that covers the most-used glyphs and the two or three platform-specific entry methods you rely on. Build a personal cheat sheet with the symbols you insert most often, their entry method, and the preferred font. Share the cheat sheet with teammates to promote consistency, especially in academic or design-oriented projects. Finally, document any recurring problems you encounter so you can refine your approach, update your legend, and keep your workflow efficient over time.
Tools & Materials
- Computer with Windows, macOS, or Linux(Specify your OS during setup to tailor instructions)
- Text editor or word processor(Where you’ll insert and test symbols)
- Access to Unicode reference (online)(Useful for rare glyphs)
- Clipboard management (optional)(Saves frequently used symbols for quick paste)
- Numeric keypad or external keyboard (optional)(Helpful for Windows Alt codes if using laptops without a numeric pad)
Steps
Estimated time: 15-25 minutes
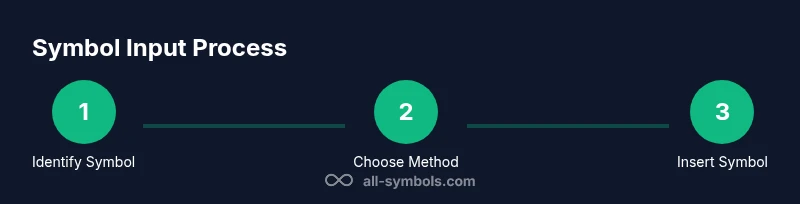
- 1
Identify the target symbol
Decide exactly which symbol you need (e.g., degree sign, check mark, currency symbol). Look it up in a reliable reference if you’re unsure. Knowing the precise glyph helps you choose the right entry method and avoid substitutions.
Tip: Keep a small personal list of your most-used symbols with their common entry methods. - 2
Choose the platform method
Select the entry path based on your OS: Windows typically offers the emoji panel or Character Map; macOS uses Emoji & Symbols; Linux supports Unicode input or Compose key. Pick one fast method to minimize interruptions.
Tip: If you’re unsure, start with the built-in emoji panel or Emoji & Symbols viewer for quick results. - 3
Open the symbol entry tool
Launch the appropriate tool for your platform (e.g., Windows emoji panel, macOS Emoji & Symbols, Linux Unicode input). Make sure the tool is focused on the document where you’ll paste the symbol.
Tip: Tip: Pin or bookmark the tool’s window for faster access during drafting. - 4
Insert or copy the symbol
Search for the symbol and insert it directly or copy it to your clipboard for paste into the target document. Verify that the glyph renders correctly with the current font.
Tip: If rendering looks off, switch to a glyph-supporting font or adjust font size to ensure legibility. - 5
Save as a reusable reference
Add the symbol to a personal cheat sheet or clipboard collection so you can reuse it without repeating the lookup. This reduces cognitive load on future writing tasks.
Tip: Organize cheat sheet by symbol category (math, currency, arrows) for quick scanning. - 6
Test in your destination app
Paste the symbol into your document, spreadsheet, or design file and check alignment, line height, and font consistency. Confirm it appears the same across different sections of your project.
Tip: Do a quick test page to ensure export formats maintain symbol fidelity.
Questions & Answers
What is the easiest way to type symbols on a laptop?
Start with the OS’s built-in symbol pickers (Windows emoji panel or macOS Emoji & Symbols). For rare glyphs, use Unicode input or the Character Map. Copy-paste remains a universal fallback.
The easiest way is to begin with your OS’s built-in symbol picker; if needed, copy-paste from a reference or use Unicode input for uncommon glyphs.
Can I type symbols without memorizing codes?
Yes. Use the built-in symbol pickers on Windows or macOS, or rely on Unicode input with a quick reference sheet. Copy-paste is always an option when you encounter rare glyphs.
Absolutely. Enter symbols via the on-screen pickers or copy-paste from a reference sheet.
Why do symbols look different in some fonts?
Glyph availability varies between fonts. If a symbol isn’t rendering cleanly, switch to a font with broader symbol support or adjust the document’s font for that section.
Some fonts don’t include certain symbols, so you might need a different font for those glyphs.
Do I need external apps to type symbols?
Most common symbols can be typed with built-in tools. External apps are only necessary for very niche glyphs or specialized encoding schemes.
Usually not—stick to built-in tools; only explore external apps if you regularly use unusual symbols.
Is there a universal method for math symbols?
Unicode entry or LaTeX-based input in editors can cover most math symbols. For quick work, Unicode input offers fast access to many glyphs.
Unicode input handles most math symbols; LaTeX can help in editors that support it.
How can I save symbols for future use?
Create a personal cheat sheet or clipboard collection and update it as you add new glyphs. Share the sheet with teammates to maintain consistency.
Make a cheat sheet and keep it handy for quick pastes across documents.
Watch Video
The Essentials
- Master at least two platform-specific entry methods.
- Font support determines symbol fidelity.
- Build a personal symbol cheat sheet for speed.
- Test symbol rendering in final formats before sharing.