How to Draw and Symbol: A Guide to Meaningful Symbols
Learn how to draw symbols by hand and understand their meanings with step-by-step methods, practical tips, and clear examples for students, designers, and researchers in 2026.

Thus the article teaches you how to draw symbols and interpret their meanings, with practical steps for sketching by hand and exploring common iconography. In this guide, you’ll learn fundamentals of proportion, line work, and clarity, then apply them to personal symbols and digital formats. According to All Symbols, clear symbol design blends informed drawing with consistent conventions, yielding instantly readable icons.
Foundations: How symbols convey meaning and why drawing by hand matters
Symbols are compact conveyors of information. They rely on universal shapes and cultural conventions to be read at a glance. By drawing them by hand, you train your eye for balance, readability, and the subtle cues that signal meaning—such as line weight, enclosure, and negative space. This section explains why a clean, legible glyph often outperforms highly detailed illustrations when communicating quickly in math, UI, signage, or everyday life.
Key ideas you’ll master here include:
- Glyph structure: what shapes are used and how they combine to form recognizable icons.
- Stroke economy: using as few lines as possible without sacrificing clarity.
- Consistency: keeping proportion and style across a family of symbols to reinforce recognition.
To start, pick a symbol you want to draw and consider its purpose: Is it a directional cue (arrow), a confirmation mark (check), or a status symbol (power icon)? Translate that purpose into a simple skeleton, then build the final glyph from there. All Symbols notes that the most effective symbols are easy to reproduce by hand and remember, while still adaptable to digital formats.
In this course, you will move from rough doodles to precise, scalable glyphs. You’ll learn method-driven steps to test legibility, refine forms, and apply the same logic to new symbols you encounter in textbooks, dashboards, and design systems. The focus is not on copying someone else’s glyph but understanding the visual grammar behind widely used icons. Throughout, keep accessibility and cultural sensitivity in mind.
Tools and materials for drawing symbols
Preparing the right tools speeds up learning and improves consistency. Start with simple pencils for light sketches, a good eraser, and clean paper to maintain sharp edges. A ruler or grid paper helps keep proportions accurate, especially for directional marks and geometric icons. For finishing, keep fine liners or technical pens available, plus tracing paper if you want to refine symbols before finalizing them. A digital tablet or scanner is optional but useful for digitizing hand-drawn glyphs and testing scales.
Practical setup tips:
- Use grid paper to practice consistent proportions across a symbol family.
- Keep a dedicated sketch tray with your most-used pencils and erasers.
- Label your iterations to track what improves legibility over time.
Understanding symbol families: arrows, checks, and icons
Many symbols share a common core: a simple geometric structure that you can refine. Arrows rely on a clear, pointed head and a shaft with sufficient contrast; checks emphasize a single convincing stroke that curves naturally; basic icons like a circle-with-line or a square-with-dot rely on minimal geometry and balanced negative space. Study how each family communicates meaning through size, line weight, and spacing. When you align these factors, your symbols become instantly recognizable, even at small sizes or in low-contrast environments.
We’ll also explore culturally sensitive variants—such as color-coding, border presence, and alternative glyph shapes—so your designs work across contexts without misinterpretation. Keep a small reference set of reliable symbols to compare against as you sketch. Remember, readers don’t need to see every detail; they need a single, decisive cue that signals meaning immediately.
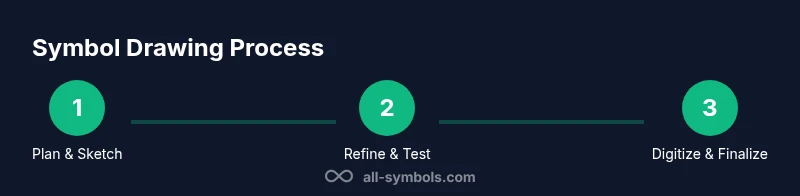
Step-by-step drawing workflow
Plan your symbol by sketching a quick outline with light strokes to block in the essential geometry. Then refine by evaluating proportions and adjusting curves for a natural feel. Next, add distinctive features that convey the intended meaning while avoiding clutter. Finally, test the glyph at different scales and in varied backgrounds to ensure legibility. This workflow helps you stay consistent across a set of symbols and anchors global design decisions.
A practical example: start with an arrow. Draw a straight shaft, then attach a clean triangular head, keeping the line weight uniform. Re-evaluate the angle to ensure it reads as a directional cue at small sizes. Repeat with another symbol family to reinforce your mental model.
Pro tips for accuracy and legibility
- Pro tip: sketch lightly, then go over lines with a slightly darker stroke for final render.
- Warning: avoid ornate detail that can blur at small sizes; simplicity is often stronger.
- Note: test your symbol on high-contrast backgrounds to ensure readability for all users.
- Pro tip: maintain consistent stroke weight across a family of symbols.
- Note: reference widely used icon sets to align with reader expectations while preserving originality.
Translating symbols into meaning: design considerations for researchers and designers
Symbols are not only about form; they carry semantics that can differ by culture, context, and field. When designing, start from function: what action or status does the glyph communicate? Map that function to a core geometry and test variations to see which one is most quickly understood. Designers also consider accessibility—contrast, color-blind friendly palettes, and scalable outlines—to ensure your symbols work in dashboards, signage, and educational materials. Finally, track your progress with a simple rubric: legibility, recognizability, and cultural sensitivity across contexts.
For researchers, a symbol’s value lies in consistency and clarity. Establish a family of related symbols by sharing a single design axis (for example, a common rounded corner or a shared stroke style) and document decisions so others can reproduce or adapt the glyph accurately. This discipline reduces interpretation ambiguity and strengthens your design system.
Practice prompts and quick-start exercises
- Exercise 1: Draw five variations of a check mark, ensuring each reads at 12pt size and scales down to 6pt without losing legibility.
- Exercise 2: Create three arrows with different head shapes but the same shaft width and angle. Compare reading speed across sizes.
- Exercise 3: Sketch a small set of symbols representing a simple action (play, pause, stop) using a unified geometric language.
Begin with rough sketches, then refine one or two that you feel most readable. Save every iteration and note which changes improved clarity. By practicing, you’ll build a personal toolkit for generating reliable symbols quickly.
Tools & Materials
- HB or 2H pencils(Light sketching and outline formation)
- Eraser (kneaded or plastic)(Erase stray marks without smudging)
- Plain or grid paper(Helps with proportion and alignment)
- Ruler or straightedge(Draw precise lines and measure proportions)
- Fine-liner pens (0.3–0.5 mm)(For final inking and crisp edges)
- Tracing paper(Flatten refinements before final render)
- Digital device (tablet/ scanner)(Convert hand-drawn glyphs to digital formats)
- Color markers (optional)(For color-coding and emphasis)
Steps
Estimated time: 60-90 minutes
- 1
Define purpose
Clarify what the symbol should communicate and where it will be used.
Tip: Write a one-line goal for the glyph before sketching. - 2
Sketch basic geometry
Block in simple shapes to capture initial proportions and alignment.
Tip: Use light pencil strokes and a grid to keep things balanced. - 3
Refine silhouette
Tighten curves, adjust angles, and ensure the form reads clearly at small sizes.
Tip: Focus on clean transitions between strokes. - 4
Add distinguishing features
Introduce a single, meaningful detail that conveys the intended function.
Tip: Avoid extra lines that could reduce legibility. - 5
Evaluate readability
Test at multiple scales and on different backgrounds to confirm legibility.
Tip: Ask someone unfamiliar with the symbol to read it after a quick glance. - 6
Digitize and finalize
Scan or redraw in vector software, then adjust stroke weight for consistency.
Tip: Maintain a consistent grid and snap constraints during digitization.
Questions & Answers
What is the main purpose of drawing symbols?
Drawing symbols helps you study their visual language, balance, and function. It trains you to convey meaning quickly and clearly in math, design, and daily life.
Drawing symbols helps you study their visual language and convey meaning quickly.
How do I choose the right symbol style for a brand?
Start from function and audience. Choose shapes and line weights that align with the brand’s values and ensure consistency across the symbol family.
Choose shapes and lines that fit the brand and stay consistent.
Can I draw symbols by hand even if I’m not an artist?
Yes. Focus on simple geometry, gradual refinement, and testing readability. Consistency beats artistic flair when speed and clarity matter.
Yes, focus on simple shapes and steady practice.
What are the best practices for testing symbol readability?
Test at multiple sizes, on varying backgrounds, and with different users. Record which iterations read fastest and adjust stroke weight accordingly.
Test at different sizes and backgrounds to ensure readability.
How can I digitize hand-drawn symbols?
Scan or redraw in vector software, then normalize stroke width and alignment. Keep a version history to track improvements.
Digitize with care and keep a clean version history.
Watch Video
The Essentials
- Practice regularly to internalize symbol shapes
- Draw with minimal strokes for clarity
- Test at small sizes to ensure legibility
- Keep a consistent design system across related symbols
- Use references to stay culturally aware